
Like
the vintage look? Doesn’t matter if you don't - you will love this Antique Wings
and Things kit regardless once you see how stunning (and versatile) it is.
Hi, Susan
here again.
I used this wonderful kit to make a birthday card with a difference.
I used this wonderful kit to make a birthday card with a difference.
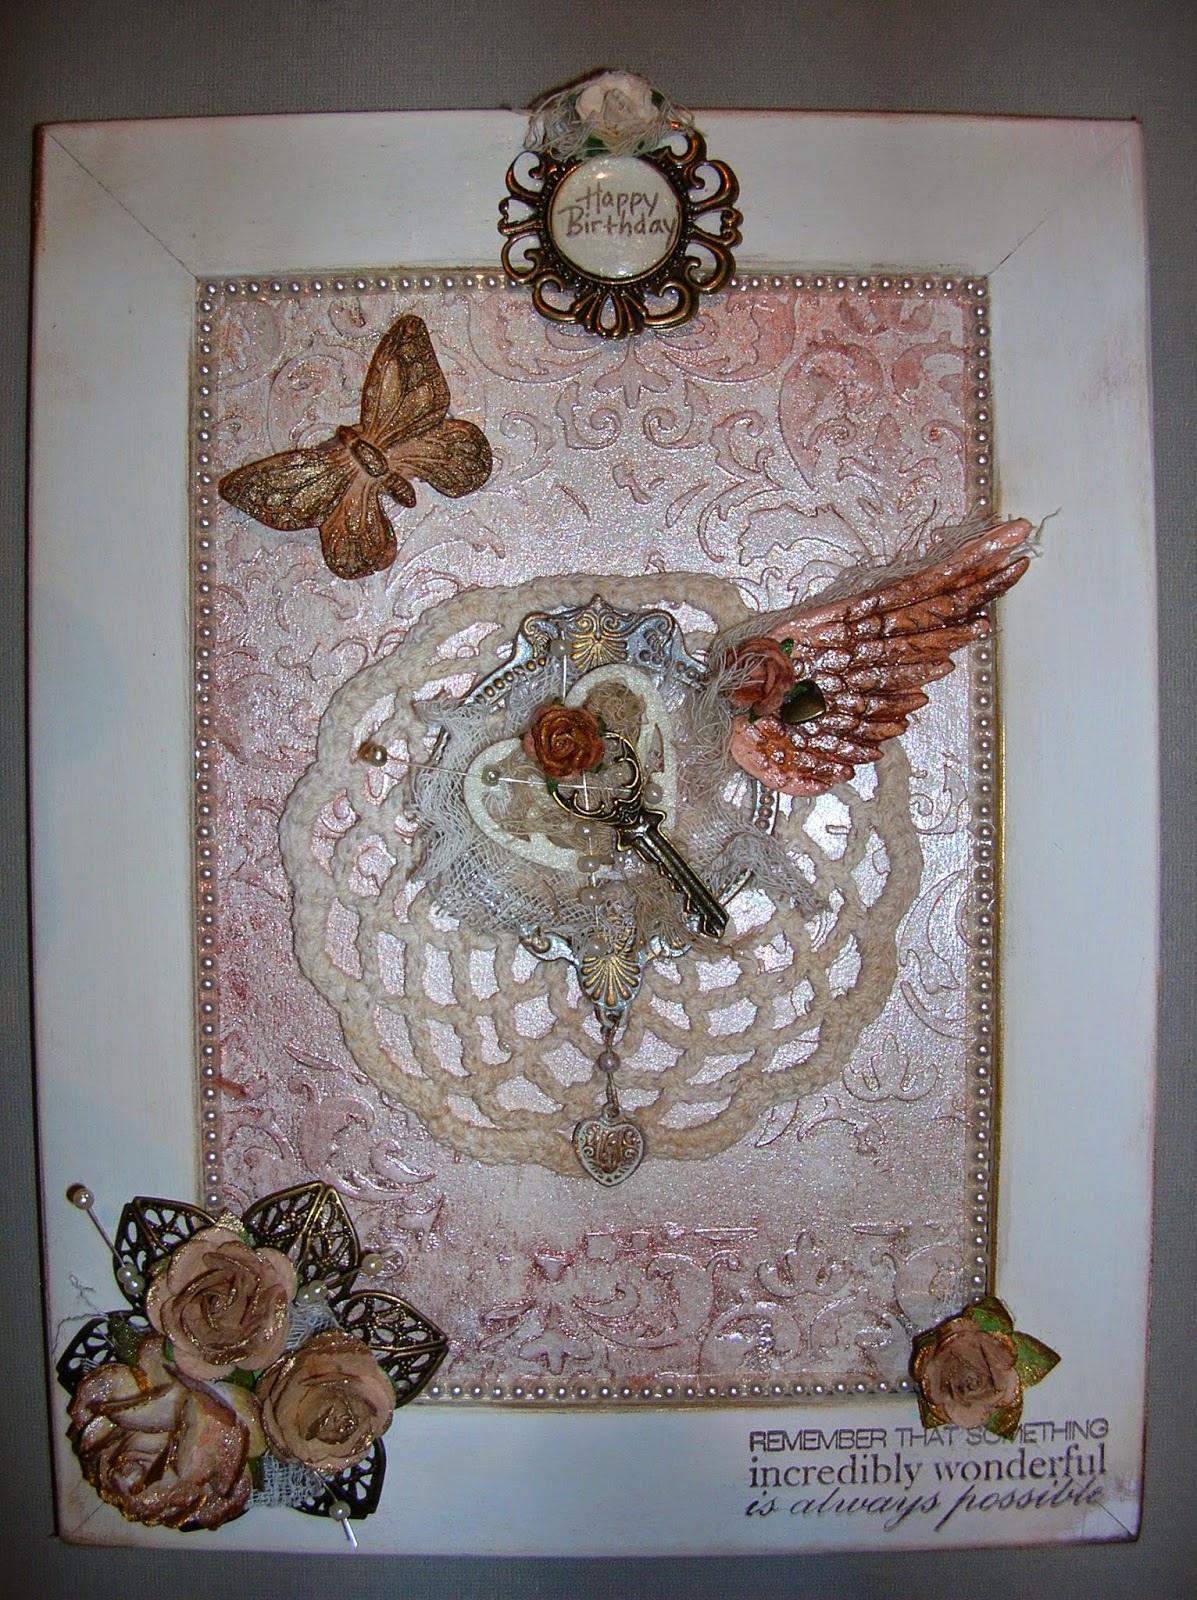
Step 1 - Alter Wooden Frame
I picked up a cheap frame from Ikea and altered it to match the
vintage style Antique Wings and Things kit.
 |
After painted and sanded, randomly rub in Walnut Stain Distress Ink and Inka Gold. |
Step 2 - Prepare Back Piece
Cut a
piece of thick card the same size as the inside of the wooden frame.
Paint with Distress
Paints (I used Picket Fence).

Using
stencilling or modelling paste, stencil your chosen design onto the back piece.
(I did not stencil all over, however you may wish to - or you may want to stencil the wooden frame instead)


Once stencilling/modelling paste is dry, I painted again with Picket Fence Distress Paint. Once paint is dry, randomly spray areas with Perfect Pearls/Glimmer Mists. I used Heirloom Gold, Perfect Pearls, Bronze and Powder Blush. If your colours are too strong, use a tissue to remove some colour and once dry, you can also spray all over with Perfect Pearls.
If you don’t have these, you can make your own sprays using Perfect Pearls powders.
A HINT: If you are impatient like me,
you can use a
heat gun to speed up the drying process.
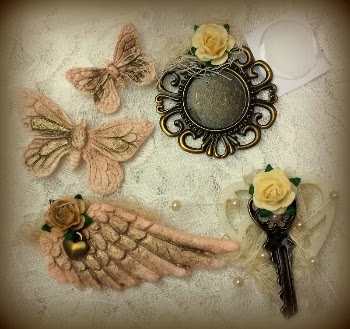
Step 3 - Colour Flowers (if not already the colour you want)
My2Angels has many flowers (white, cream or coloured) for you to select from.
I
changed the white
roses using the some of the same colours I used for the back piece - Powder Blush, a small amount of Copper and lastly Perfect Pearls. I painted just the edges of the rose petals
with gold paint using a dry paint brush.

Step 4 - Alter Other Pieces
I also used
some muslin and a white crochet doily, both of which I changed the colour of with
tea
to give a more vintage look.
I found a
cheap metal frame, which I spray painted cream. Once dry, I lightly sanded the raised parts of
the frame and rubbed in Inka
Gold – Old Gold onto the raised areas.

Step 5 - Put Frame Card Together
Adhere your
prepared back piece to the wooden frame backing and place back into the wooden frame.
Adhere strips of pearls around the inside edge of the wooden rame.
Stamp 'Happy Birthday' onto cream card and cut out with circle punch. Adhere into brass frame from the kit and adhere the epoxy circle on top of this. Adhere to wooden frame.
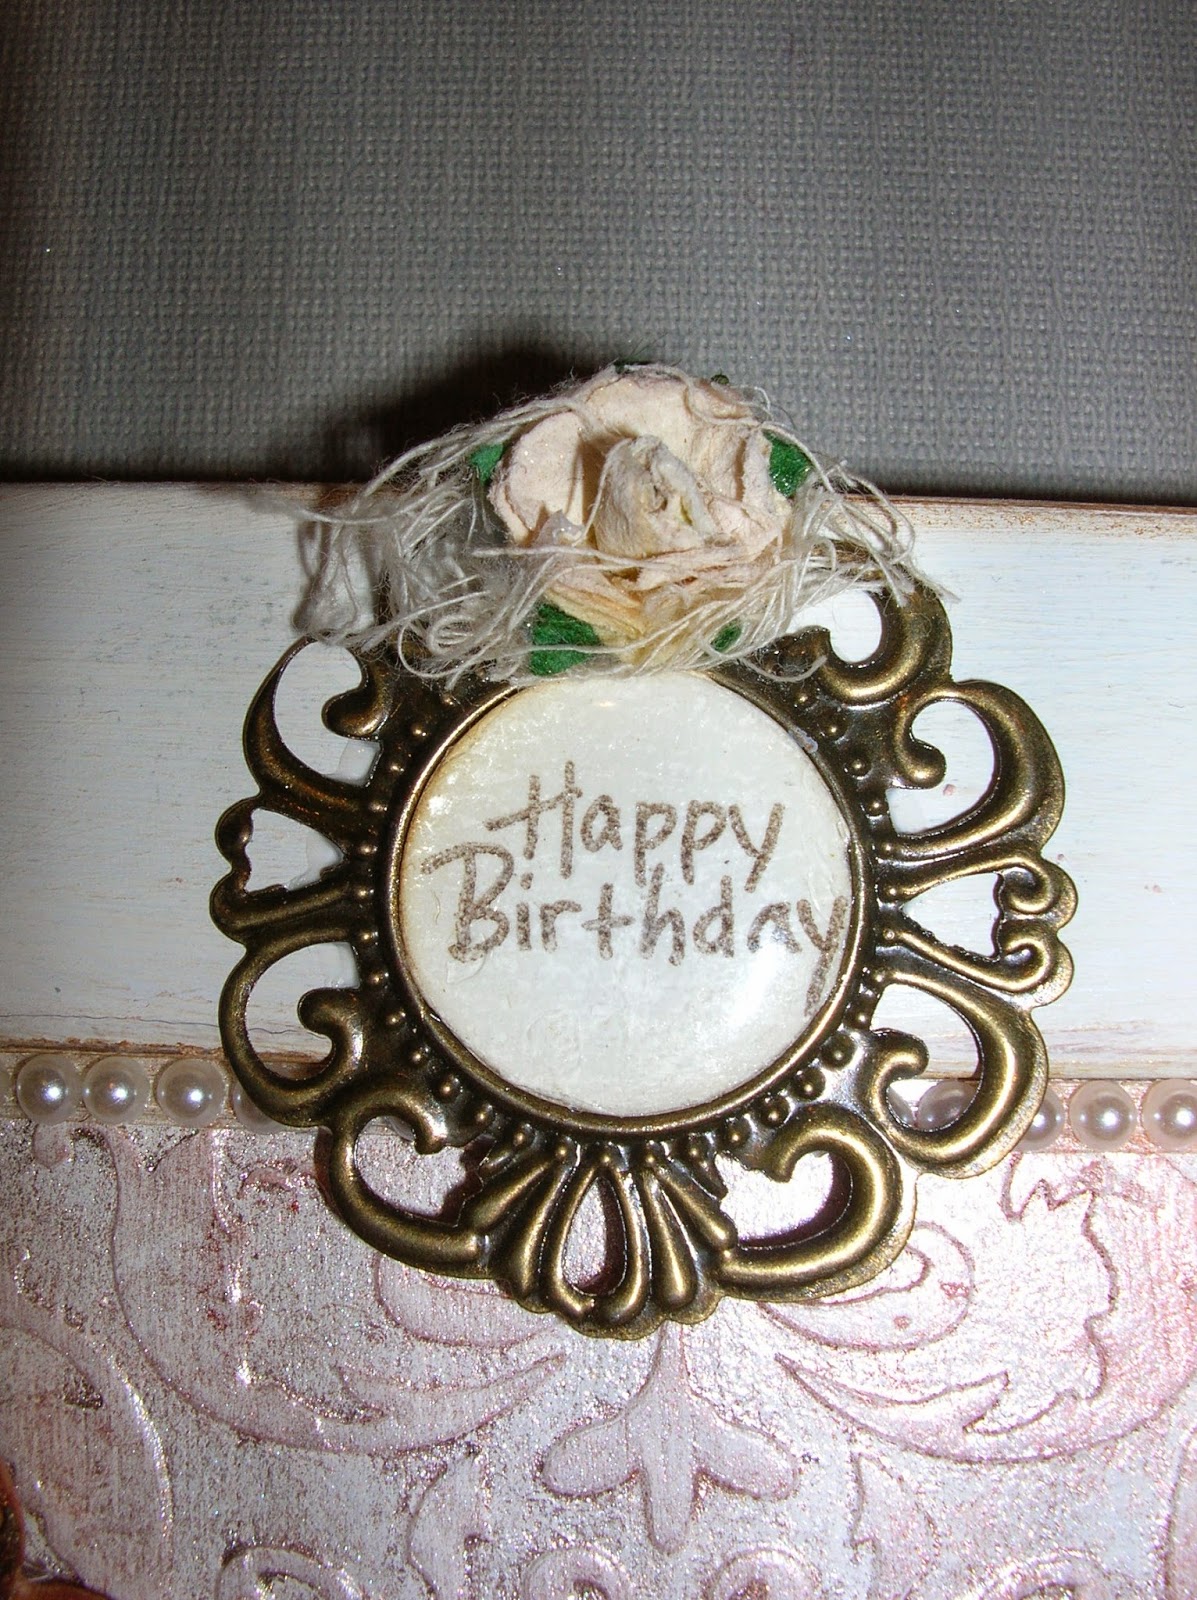
Stamp sentiment onto the frame (if you wish).
Adhere an Antique
Bronze Large Flower Filigree to the bottom of the frame. Adhere
a piece of muslin onto the filigree flower.
Using Scrap Dots Silicon Glue (or similar), adhere the white roses which have been coloured.
You can then stick pieces of Ivory Pearl Garland in between the roses, making sure they are pushed into the silicon glue.
Using Scrap Dots Silicon Glue (or similar), adhere the white roses which have been coloured.
You can then stick pieces of Ivory Pearl Garland in between the roses, making sure they are pushed into the silicon glue.
Finish putting
together as per the sample pictured.


No comments:
Post a Comment